
Online Data Collection with Qualtrics, MTurk, and SONA
Online data collection lies at the heart of modern psychology research, particularly during a pandemic. Online data collection is easy, fast, and (mostly) hassle free. It allows for the collection of massive data sets in very little time. The most well-known tools for online data collection are Qualtrics and Amazon Mechanical Turk (MTurk), both of which we will explore in this tutorial, but of course there are numerous other options and tools available, including writing your own experiments using JavaScript! We will also take a look at Duke SONA Systems, which is Duke’s site for undergraduate, for-credit research participation.
In this tutorial, we will go step by step through the process of designing an experiment (using Qualtrics) and then examining how to use MTurk (paid participants) and SONA (undergraduates for course credit) to share this experiment with participants. Finally, we will briefly discuss using JavaScript to design more complicated, customized experiments, and how these too can be given to participants via online websites.
If you have any questions about these or other methods of online data collection, please contact me at raphael.geddert@duke.edu!
Experiment Design with Qualtrics
To begin, you will need a Qualtrics account. Head to this Duke Qualtrics page to access your free account, and from then on simply head to duke.qualtrics.com. This free account comes with all of the tools and features we need to design your own tasks and questionnaires.
For non-Duke users, Qualtrics is freely available, although with limited functionality. Most universities also offer accounts, so check with your department or organization!
To Do: Create your own Qualtrics account and log in.
Experiment
Before we begin in Qualtrics, let us describe a simple experiment. What does it consist of? A simple experiment might consist of a consent form, a demographics form, a task, and finally a debrief form. We will create each below. In this experiment, we will be asking the following question:

A simple experiment, sure, but somewhat interesting! And it will let us see the full power of Qualtrics in just a few simple steps.
1. Create a new project
In Qualtrics, click on Create project. This opens up a window of many various templates and sample projects that can be super useful if you are developing a particular kind of experiment, but for today we will be creating an experiment from scratch. Click on Survey under the From scratch header, and then on Get started.
The first thing we will want to do is name our project, so we’ll name it DIBS Methods Journal Club Experiment, and then click Create Project.
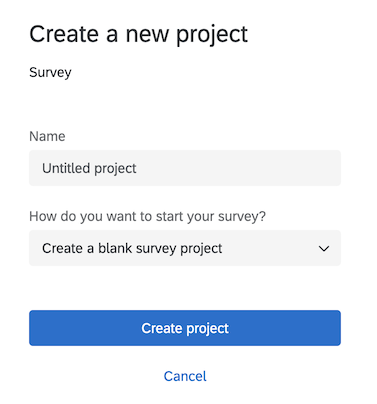
To Do: Create a new project.
2. Qualtrics Layout
Let’s take a second to orient ourselves to the layout of Qualtrics. In the middle of the webpage you should already see the beginnings of an experiment or survey: a blank Q1 with some multiple choice options, and then some useful buttons like + Add new question and Add Block. We will use those in a second. On the left hand side are several menus, including Builder, Survey Flow, Look and feel, and Survey options. The Builder should be open now with Q1 selected, and you should already see how we can use this tool to format and change the characteristics of Q1.
Finally, along the top, we have menu items like Survey, Distributions, Data & Analysis, and Reports. On the right hand side there is also a Preview and a Publish button, which we will need as well!
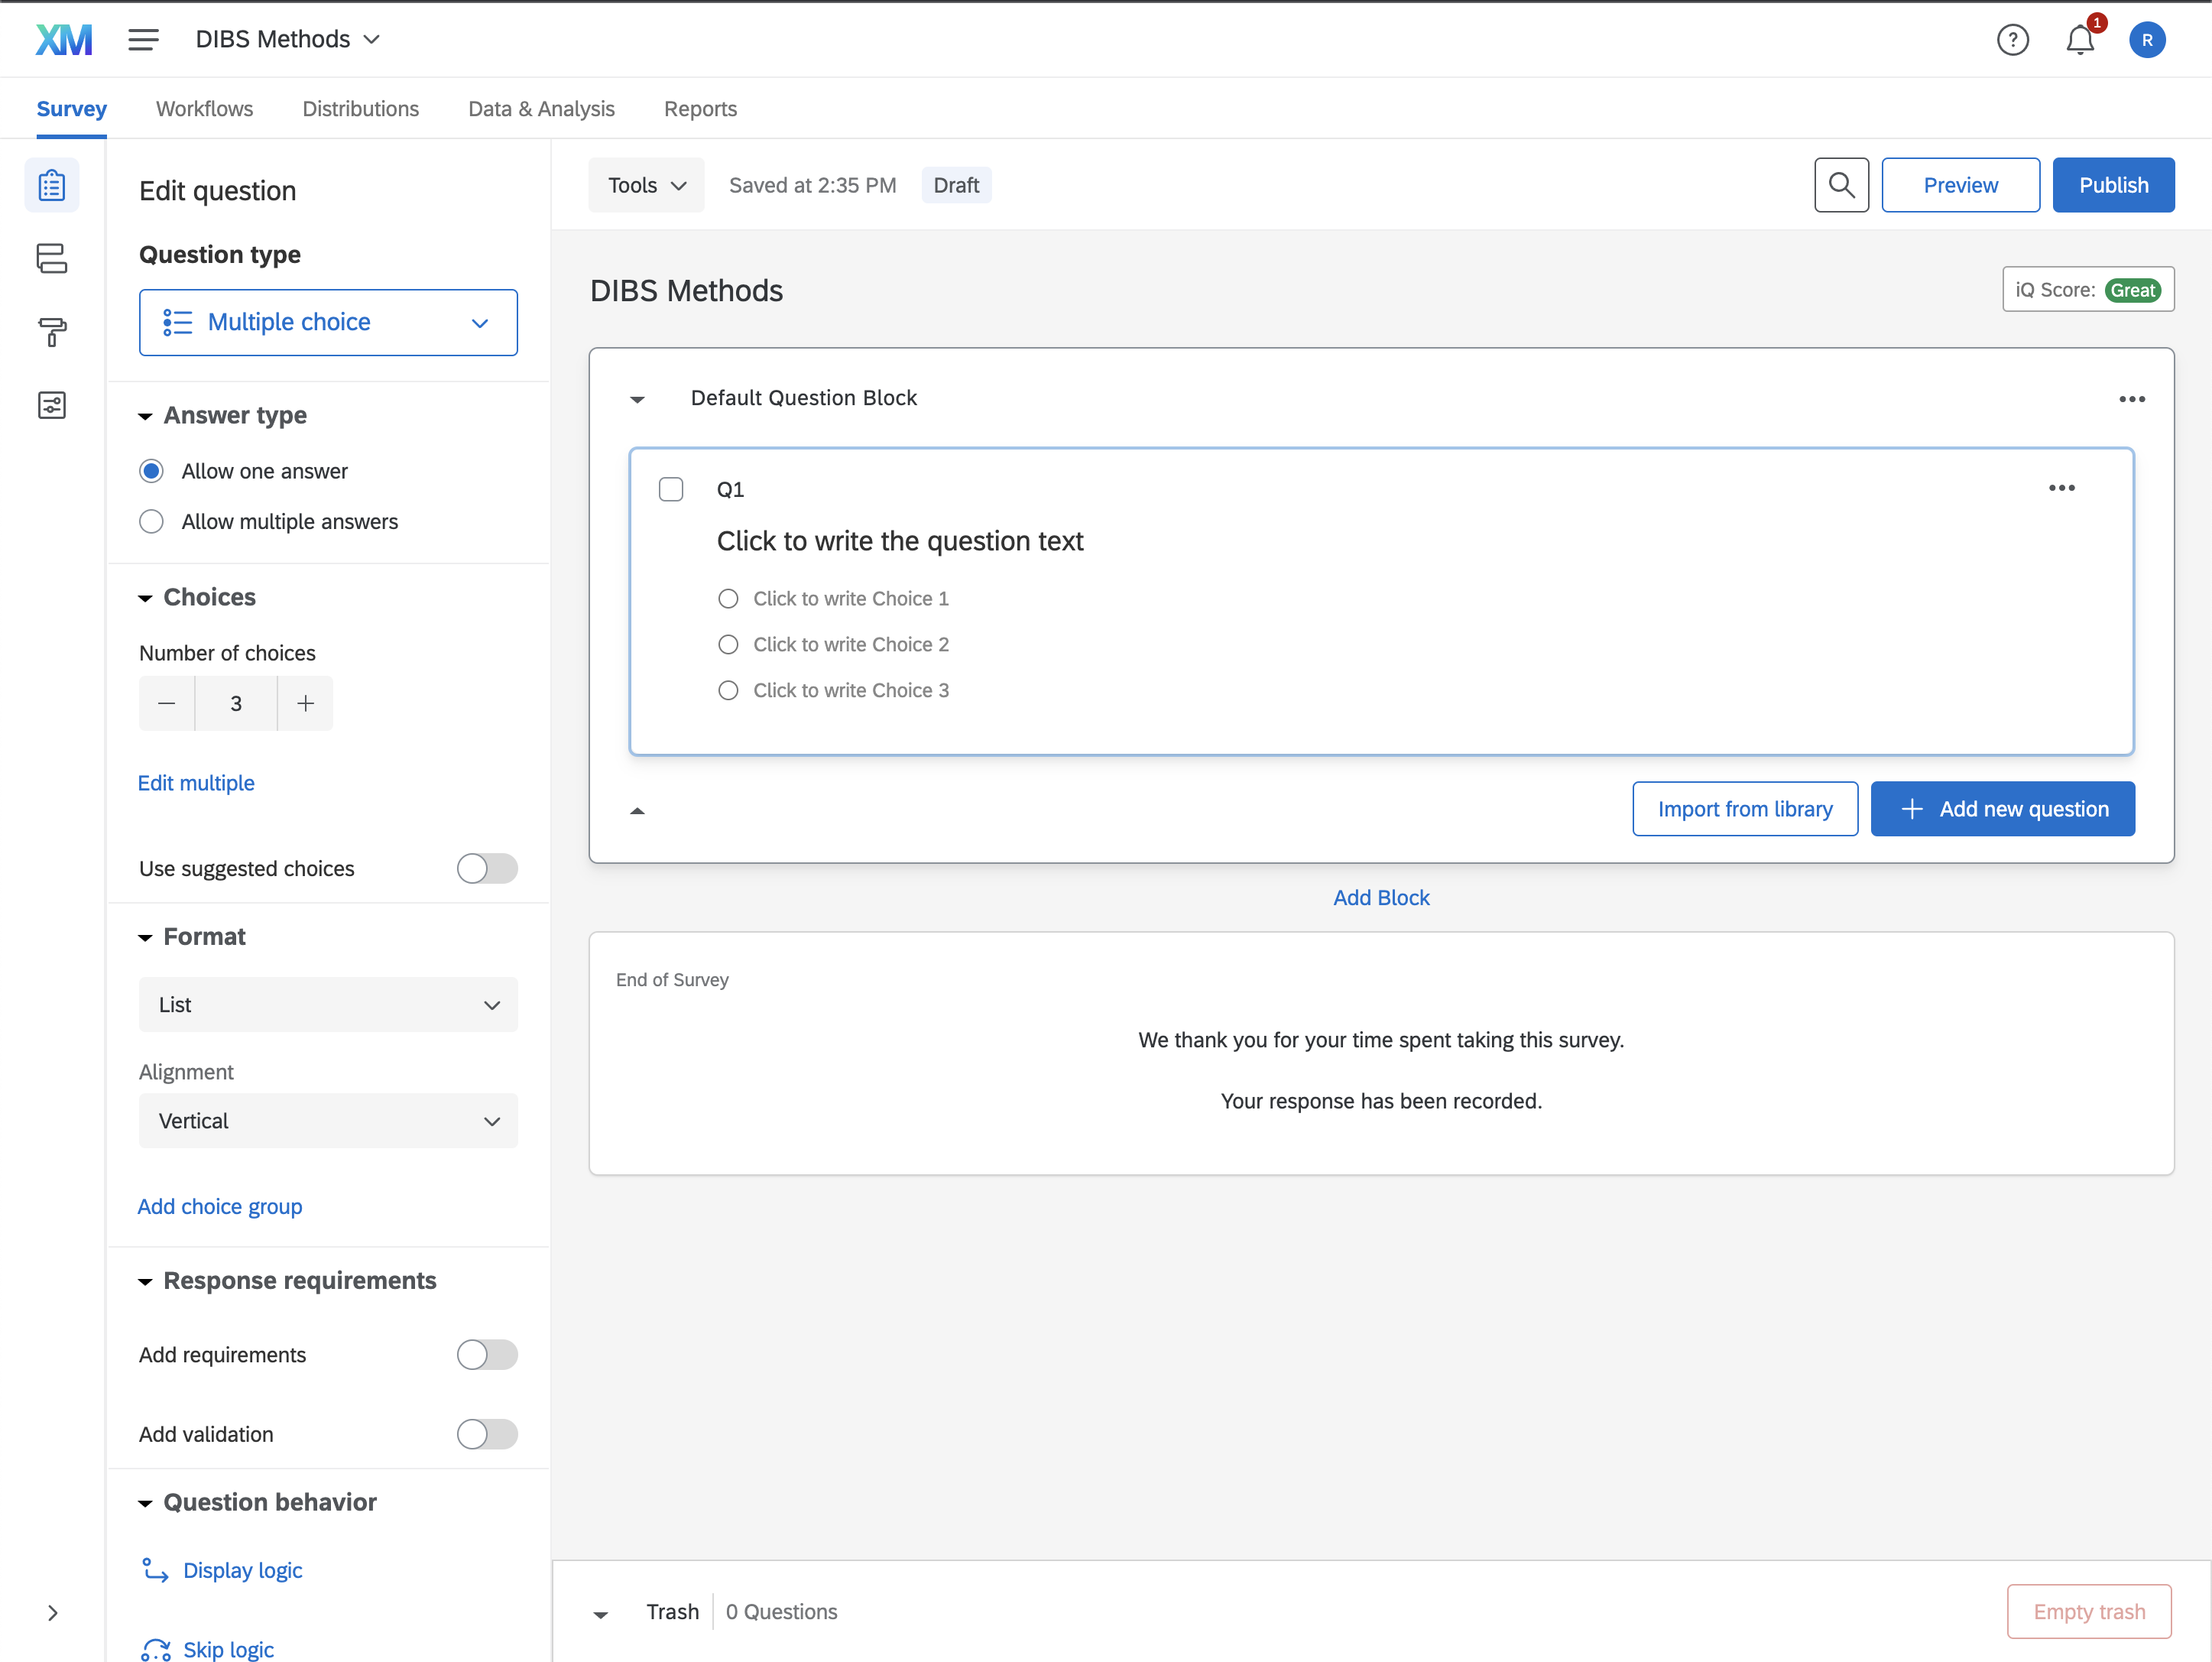
3. Creating Experiment Blocks
The most basic functionality of Qualtric’s surveys are blocks and block contents. You can think of blocks as individual “pages” or “sections” of our experiment, and each block can contain multiple questions of various question types.
We’ll start by creating some new blocks. First, we will rename the block that is already there (that contains Q1), from Default Question Block to Consent. We’ll also add blocks for the rest of the experiment.
To Do: Use the
Add Blocktool to create additional blocks:Demographics,Experiment, andDebrief.
Consent Block
Click on Q1 in the Consent block. Notice that the Question type, visible in the Builder on the left, currently says Multiple Choice. That is no good for a consent form, so click on the drop down and select Text / Graphic. You’ll already notice a variety of other useful question types, like text entry, slider, and others.
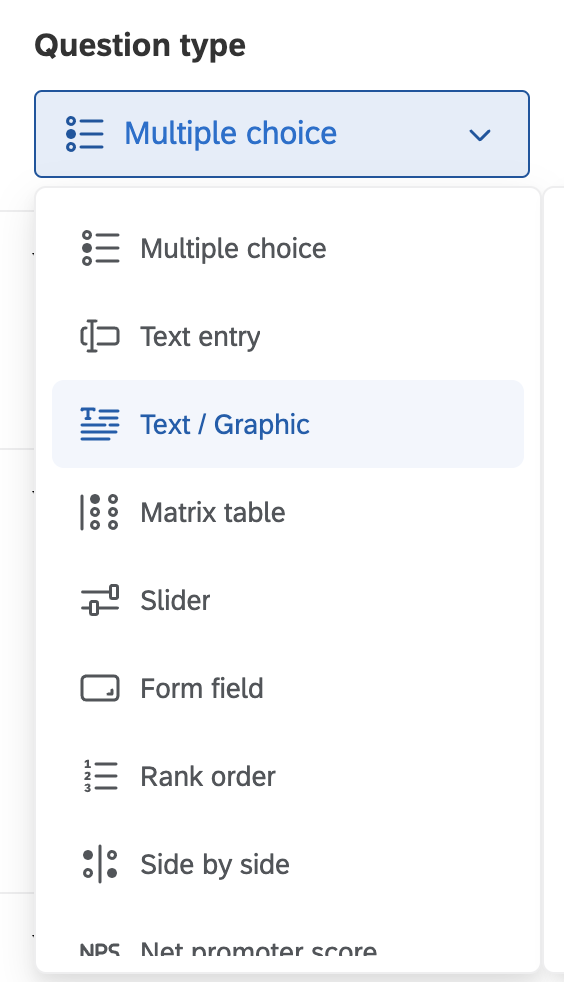
To Do: Change the name of
Q1toconsent_contentand change the question type toText / Graphic.
Normally, you would paste in whatever consent document you have gotten approved by the IRB, but for our purposes we will just paste in the following:
1
2
3
4
5
6
7
8
Key Information
This is an example consent form for a study hosted by the DIBS Methods Journal Club at Duke University. Its purpose is to demonstrate how to create an experiment in Qualtrics using MTurk and SONA.

Procedure
You will start with a demographics form. Next, you will answer one question. You will receive a confirmation code to finish. Please paste this confirmation code in to the MTurk window before submitting.

Eligibility
You must be 18 years or older to participate.
Pasting into Qualtrics can be a little gimmicky, so be sure to press on Rich Content Editor... to edit the text.
To Do: Use the
Rich Content Editorto format that consent. Bold the headers and add spacing as necessary.
Next, click + Add new question, and choose Multiple Choice. Change the question text to: Do you affirm that you have read the above consent and agree to participate in the study?. We will create 2 options for answers, one that says: I have read the above consent and agree to participate in this study. and another that says I do not wish to participate..
To Do: Create a “I agree to participate” button and rename the question to
consent_agree.
Click on Add requirements and force response, as this question is completely necessary for doing this task. We don’t want participants not to answer the question.
If the participant doesn’t agree to the task, they shouldn’t be able to continue participating. To enable this, we will use Skip Logic to end the experiment if the participant says they do not wish to participate. We’ll fill it out so that it skips to the End of Survey if I do not wish to participate. is Selected. Click Confirm.
To Do: Make
consent_agreea required question, and useskip logicto skip to the end of the experiment if the participant declines to participate.
That’s it! Click on the ... within the Consent block and select Preview block to test the consent page.
To Do: Preview and test the consent block.

Demographics Block
In our demographics block, we will be asking our participants about their biological sex and age. Insert 2 questions, one that is a multiple choice named demo_sex, and another that is a text entry named demo_age. For the first question, we’ll make the question say What is your biological sex?. You’ll notice that Qualtrics anticipates the kinds of responses we are looking for, awesome! We will just use these defaults for now, but of course you are more than welcome to change them however you like.
For the second question we will ask What is your age?. Now, we only want certain responses to this question, specifically some integer between 1 and, say, 99. Now, most studies only involve adults, so we can further specify that the minimum age is 18. Clicking on this question, we can head over to the Builder tool and click Add Validation. Select Content type, and below it Number. Here we can specify the minimum and max value that is allowable. We’ll specify that we want an integer between 18 and 99, with no decimals allowed.
To Do: Create a
demo_sexmultiple choice question and ademo_agetext input question. Usevalidationto restrict the allowable answers for age. Be sure to preview and test this page.
Experiment Block
Our experiment block will consist of a single multiple choice question, that will ask the participant which of the following 5 colors (like below) corresponds to the color grey or gray.
Unbeknownst to our participants, half of them will be asked the question with the word grey inserted, and the other half will be asked the question with the word gray inserted. We will see if people have different color expectations between those two ways of spelling grey.
To do this, we need to create two separate multiple choice questions, one named choice_grey and another named choice_gray. Both questions will have the following text (with the second having gray instead). Start by creating just the first one, choice_grey.
1
Which of the following most corresponds to the color grey?
We will add 5 options and add to each choice an image file corresponding to a different grey image using the Insert Graphic tool.
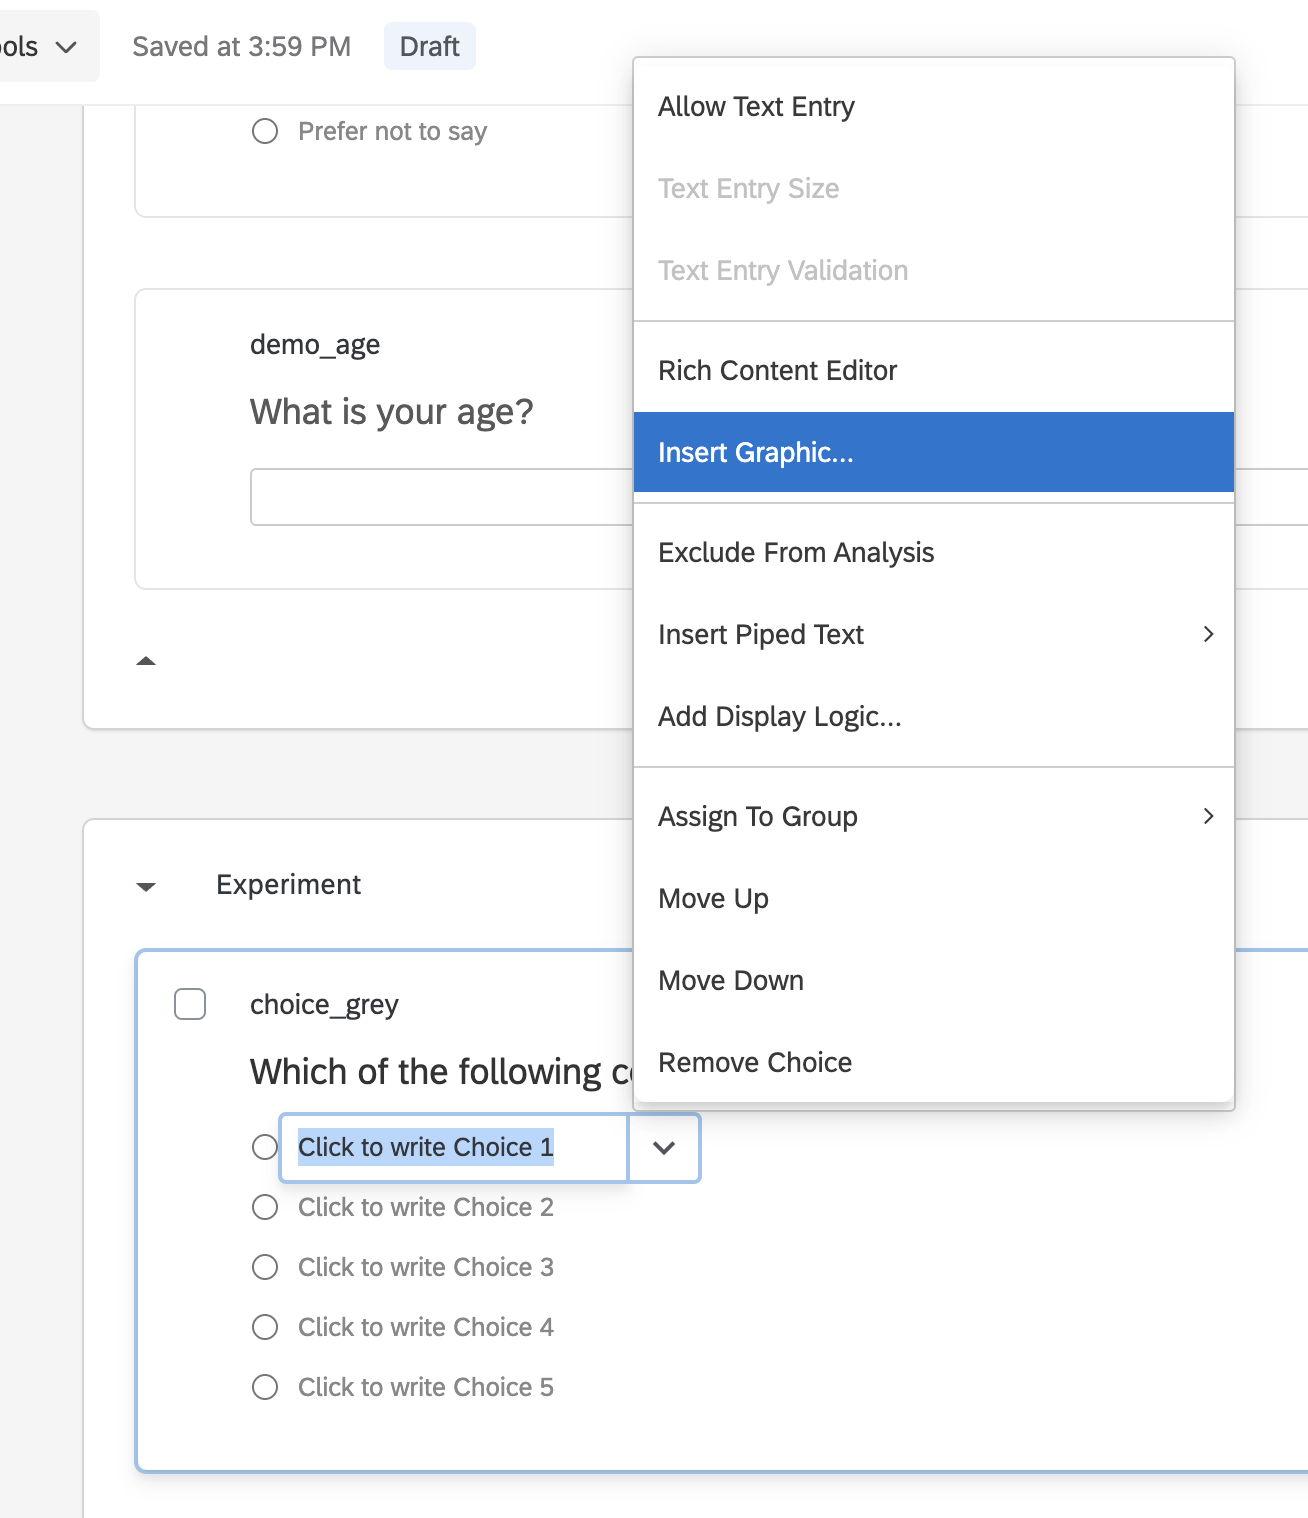
Be sure to adjust the size of each using the Graphic Size option. The final result should look like this:
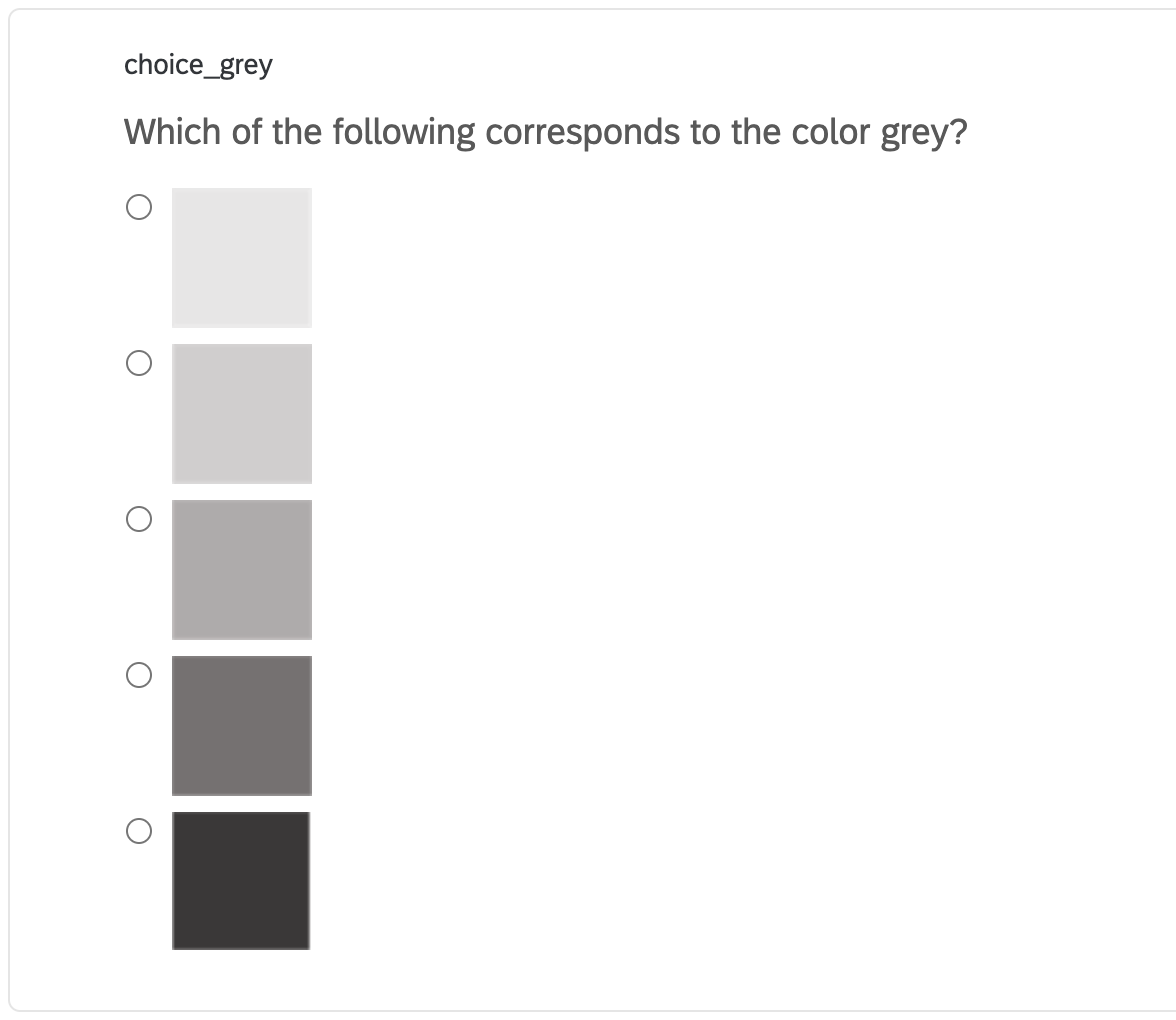
Finally, head to the question options and enable Add requirements. We are also going to Recode values, so that the data is an integer 1-5 instead of the name of the image file.
Now, simply copy choice_grey using the ... tool, and it will duplicate the question! Use this to create choice_gray with the new spelling.
To Do: Create two questions, one called
choice_greyand one calledchoice_gray, with 5 grey color options.
We only want one of these two questions to display to any given participant. Select the Experiment block, and under Edit block on the left, select Question randomization. Select Present only ___ of total questions and input 1.
To Do: Use block randomization to display only one of the possible questions to each participant.
Preview and test the block to make sure it is working!
Debrief
For debrief, we will create a Text / Graphic question named debrief_content.
Paste in the following:
1
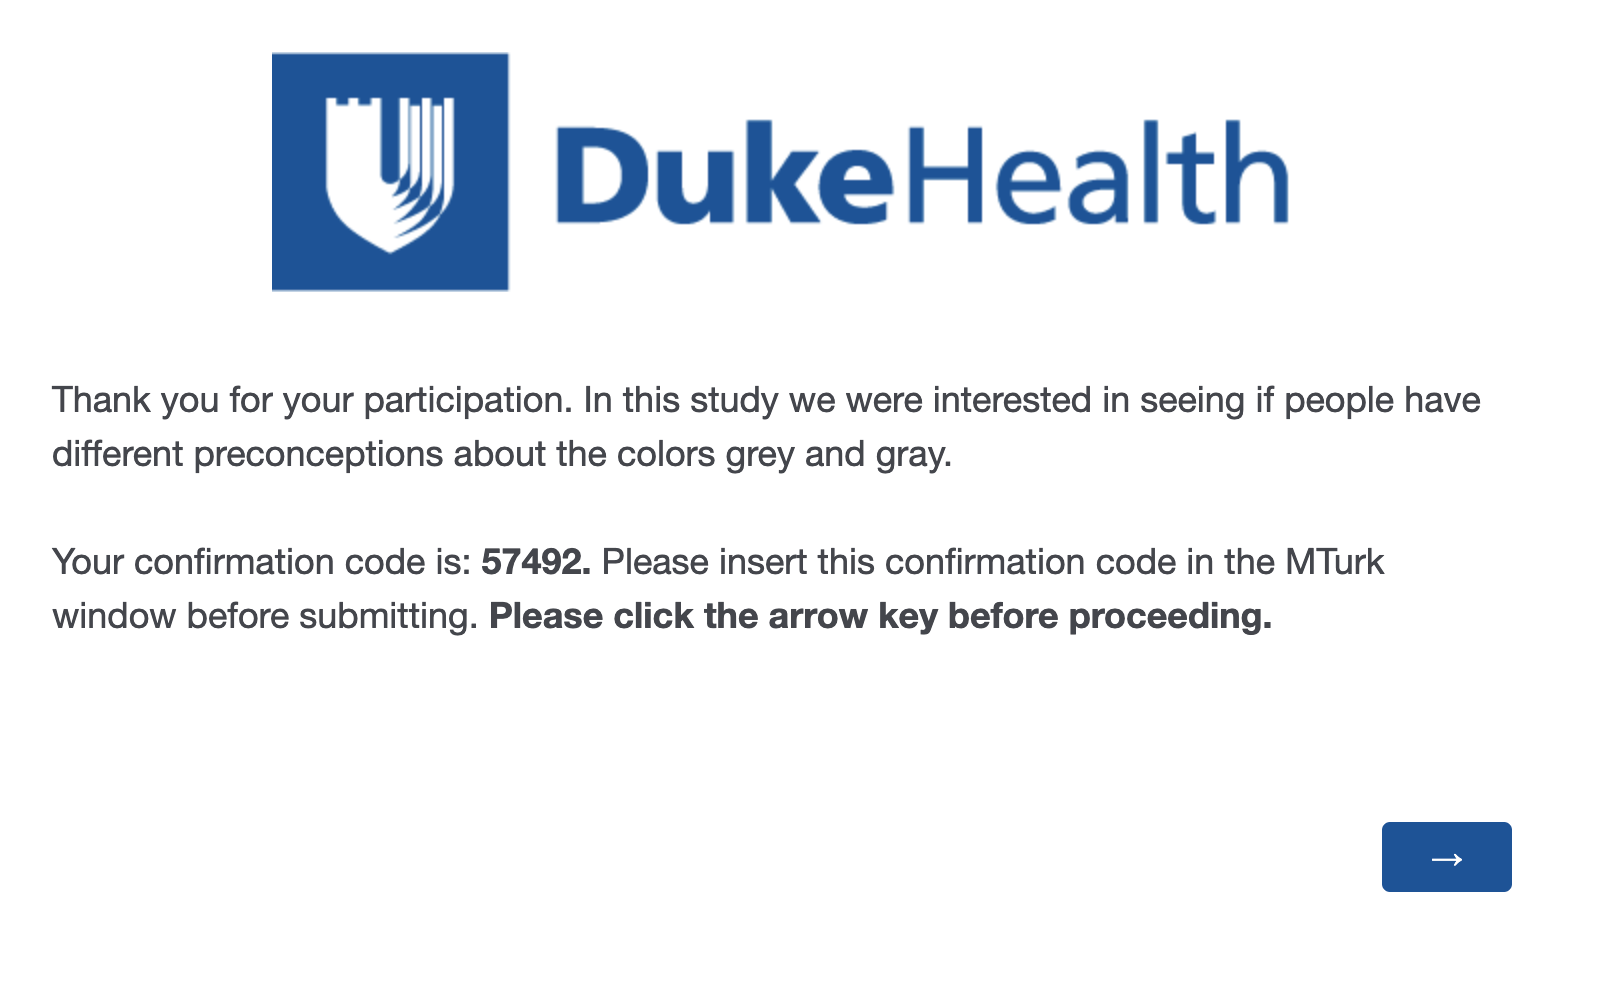
Thank you for your participation. In this study we were interested in seeing if people have different preconceptions about the colors grey and gray.
To Do: Create a debrief item.
Now, in order for participants to be identified, it is useful for us to give them a confirmation code to tie their participation to their data. This is especially important for MTurk workers, who are used to providing confirmation codes from external websites.
On the far left hand side, click on Survey Flow via its little icon. This will bring up a page that displays the various blocks within our experiment. We want to create a new hidden element that corresponds to a numeric code for our participant.
Click + Add a New Element Here, and select Embedded Data. In the left field, type in your own name, which we will call survey_id. Click on set value > insert piped text > Random Number > and specify a number between 10000 and 99999.
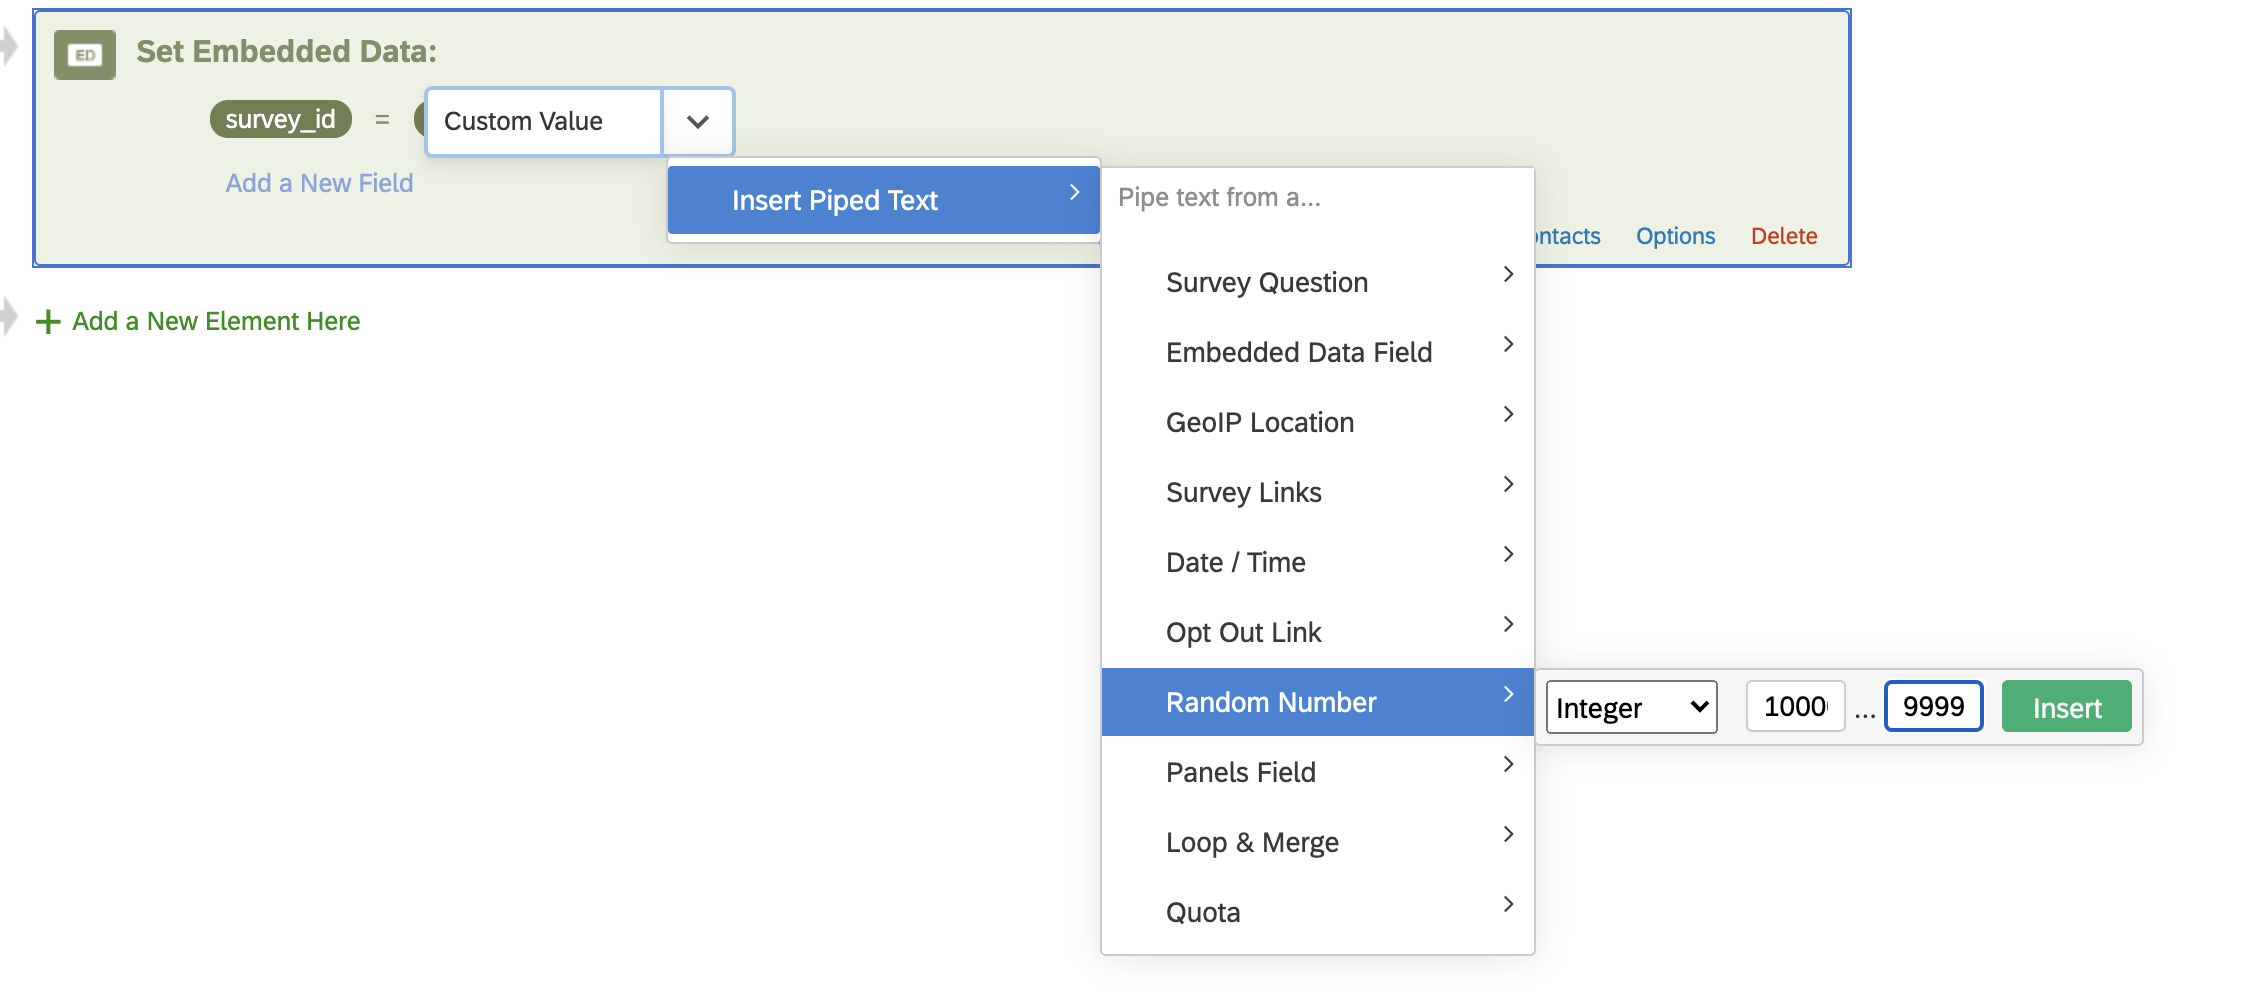
Next, click Move and drag the element to the top of the survey flow, so that this element gets created immediately for each participant.
To Do: Use Survey Flow and Embedded Data to generate a random survey id for participant.
Now that we have created a survey ID, it is time to give this to our participant in the debrief. Head back to our experiment.
To input our survey ID into the debrief text, select Piped Text. Select Embedded Data Field, and search for our survey_id item we just created.
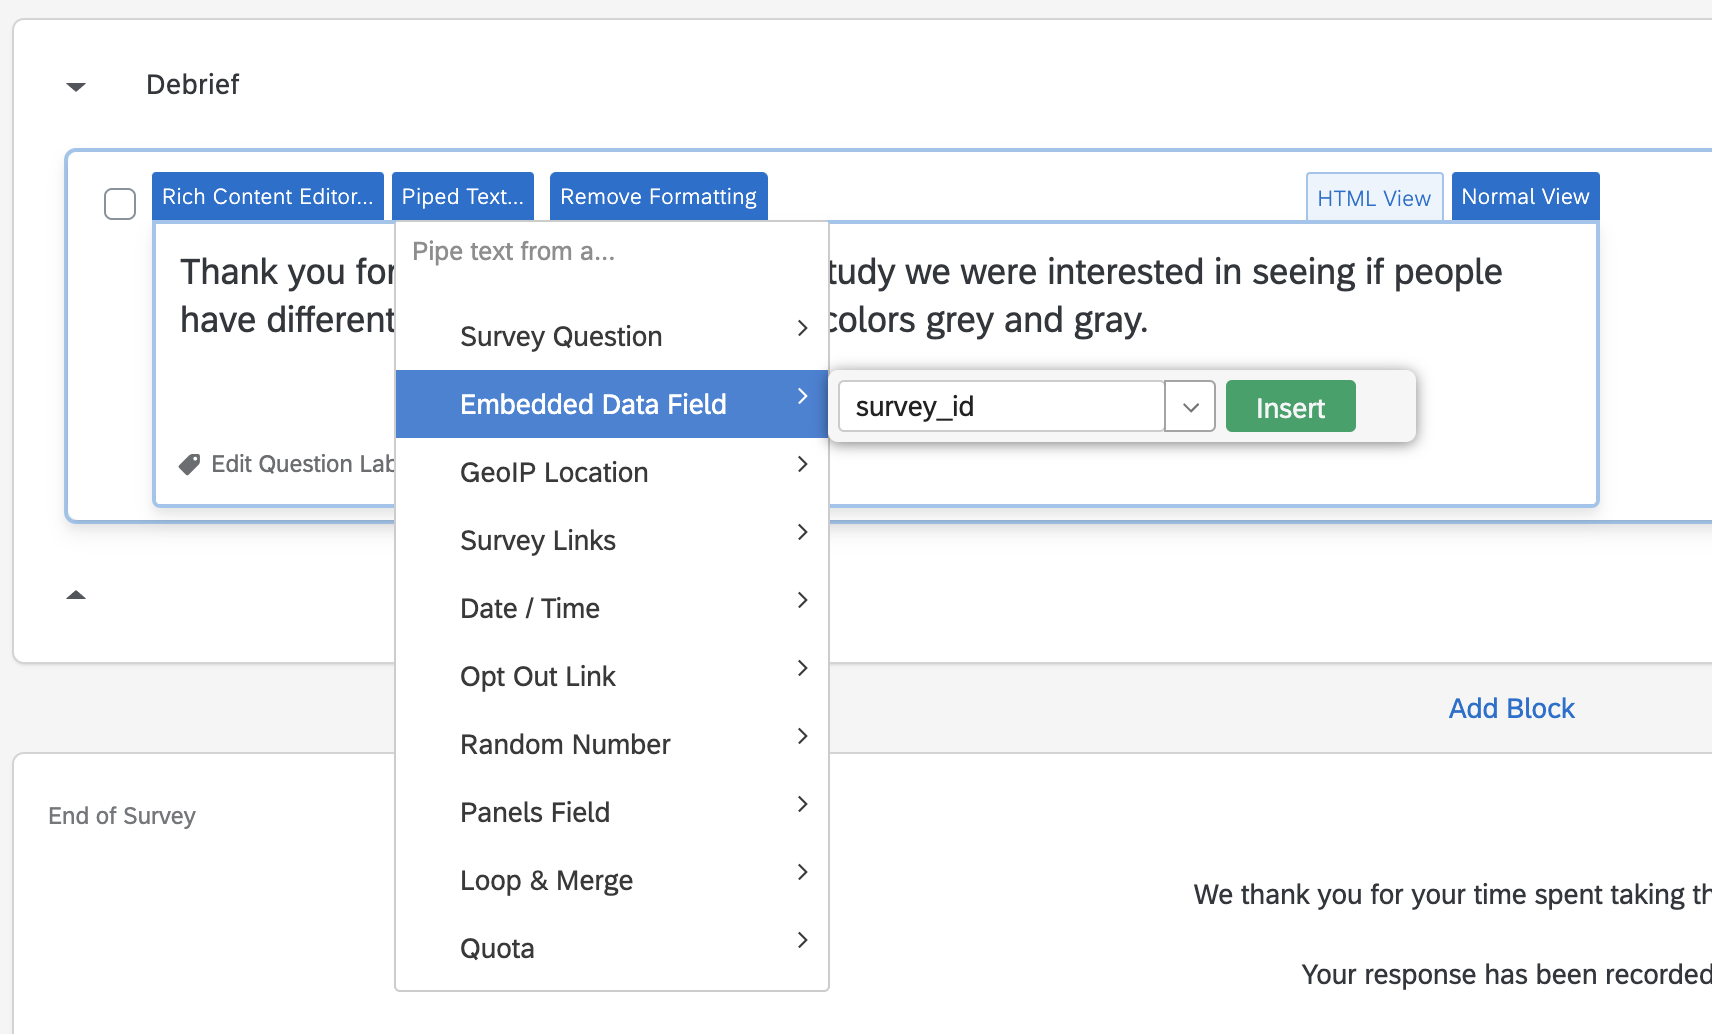
We will add Your confirmation code is: to the beginning of it, and follow it with Please insert this confirmation code in the MTurk window before submitting. Please click the arrow key before proceeding.
To Do: Use Piped Text to give our survey id to our participant in the debrief. Run through the whole experiment to make sure it is working.
And that is it! Congratulate yourself on creating a working experiment in Qualtrics. Press Publish to finish setting up the experiment. The experiment is ready to go!
To Do: Publish the experiment.
4. Collecting data
Let us all take a second to fill out the experiment. Head to link provided by Qualtrics. This link can also be retrieved by heading to Distributions and then to Anonymous link.
Data will appear under Data & Analysis. From here it is trivial to download a CSV file.
To Do: Check out Data & Analysis to see the data as it comes in.
NOTE: The data that Qualtrics gives you is extremely messy. Head over to Kevin’s excellent Tutorial on Data Wrangling to learn about processing it!
MTurk

Amazon Mechanical Turk is crowdsourcing website where people from all over the world can complete “HITs” in exchange for money. Now that we have created our qualtrics experiment, posting it to MTurk is as easy as creating an account, providing the link, and posting it to participants.
In order to create an assignment on MTurk for people to do, you would need to head over to requester.mturk.com, which would create a task for people on mturk.com to complete. Since this is just a demo, however, there is another solution!
MTurk Sandbox
Amazon has created a sandbox version of MTurk requester and a sandbox version of the worker account. For this quick demo, we will use these pages instead. They perfectly mimic the real thing, but allow you to post HITs for free in order to test out your code and see that everything is working as it should be.
To Do: Sign in to both requestersandbox.mturk.com and workersandbox.mturk.com in separate tabs.
Creating a HIT
Below you can see a screenshot of my login in the an MTurk requester sandbox page. The two main pages are Create, which allows you to create new and modify existing HITs. You can also Publish a Batch, which means that you make your assignment ready for X number of people to participate. Secondly, Manage allows you to see existing batches that you have posted, review who has participated in each, and confirm them so they get paid for their participation.
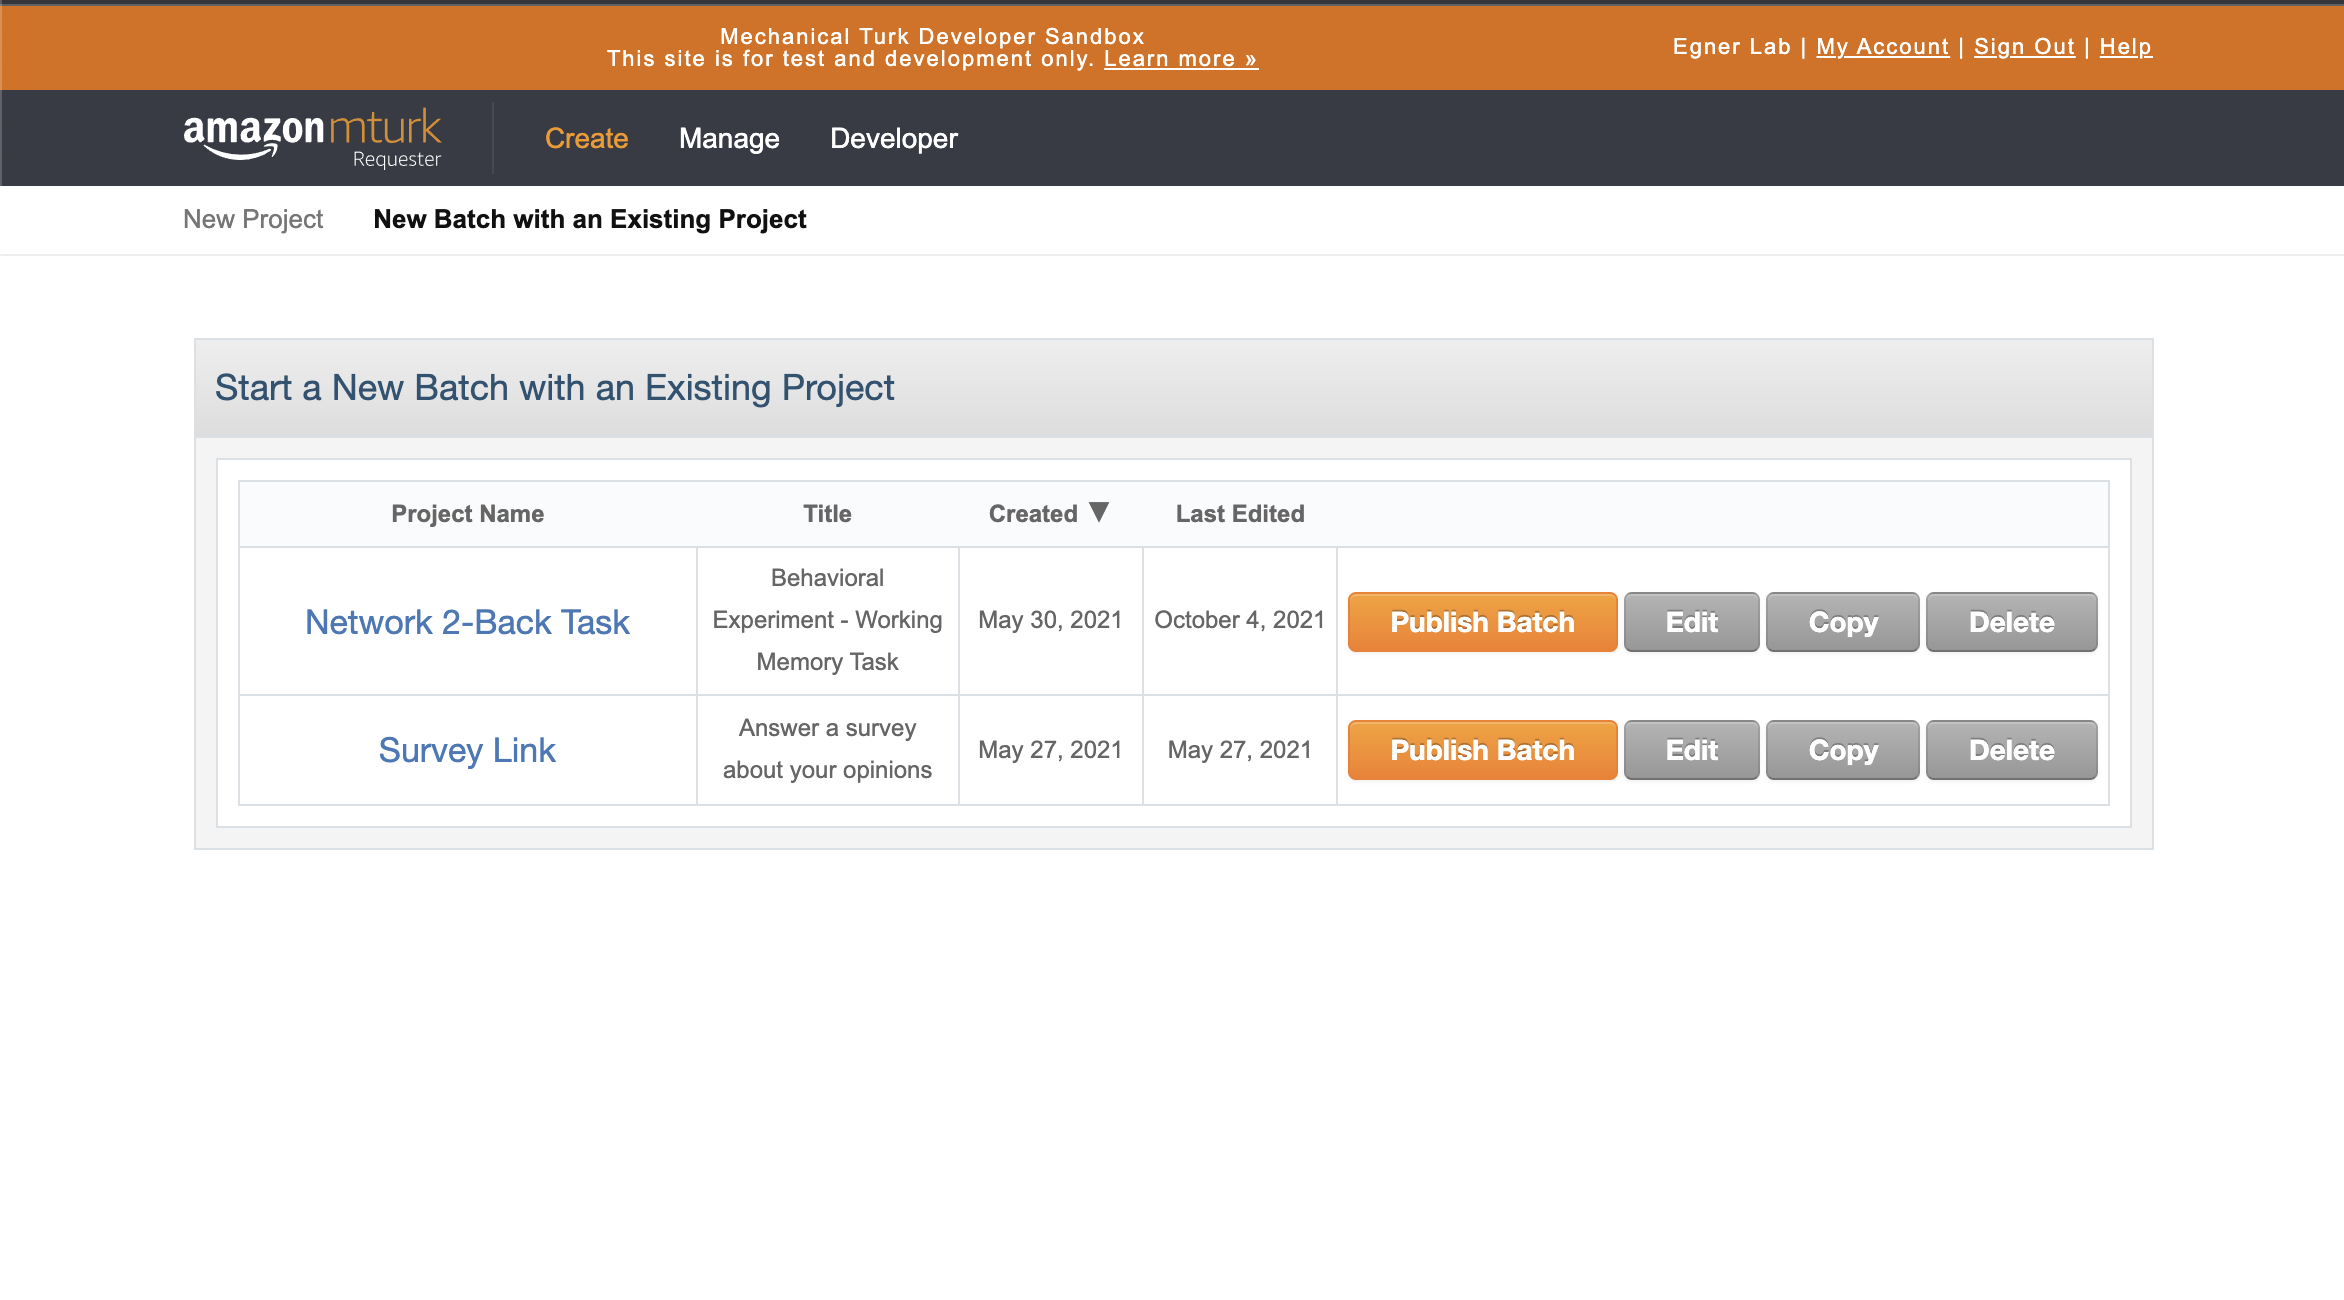
Head over to the Create page and select New Project. MTurk will give you a variety of prebuild options. We are using an external Qualtrics link here, so we will use the Survey Link default, by far the most common option. Click Create Project to proceed.
Enter Properties
Once created, you will have a page of properties to adjust. Most of these are self explanatory, but a few are worth elaborating on.
-
Reward per response: MTurk tasks are thought about as reward per time, not per assignment. That is, it is considered best practice (and most equitable) to post assignments that corespond to an equitable $/hour. Since we have to specify a lump sum here without knowledge of exactly how long this task will take for each worker, we need to approximate ahead of time and think carefully about which HIT is worth it.
-
Number of respondents: This indicates how many participants are in our “batch”; i.e., how many people will be able to access this HIT. Amazon takes a 20% fee for batches over 20 people, so it is common practice to post many batches of 9 people if one wishes to avoid that fee. There are other ways of posting numerous batches simultaneously while preventing duplicate workers, but these are outside the scope of this tutorial.
-
Time allotted per Worker: Once a worker “accepts” a HIT, a timer will start after which the HIT will expire and they will lose the ability to complete it anymore. Many workers alternate between an hour of refreshing the HIT page accepting HITs and then a few hours doing them back to back to save time, so it is considered best practice to give workers several hours more time to complete the HIT than it actually takes.
-
Worker requirements: The last important thing we can do at this page is add criteria to limit or control which kind of participants are allowed to participate in our studies.
Click (+) Add another criterion:to view the list of possible criteria we can apply. Premium qualifications can incur additional fees, but the available system criteria are common and quite useful. For our task, we will specify that the location of our workers must be the United States, that worker must have completed at least500HITs have an approval rating overall of at least 95%. These stipulations are not difficult to achieve, considering that many HITs take only seconds to complete.
To Do: Fill in the
Enter Propertieswith task details, including additional criteria to limit which participants are able to participate.
NOTE: Since we want to test this on worker sandbox, we will actually delete this criteria again for the demo. The reason is that our worker sandbox account wont be able to meet the requirements, and that is no good!
Design Layout
The design layout includes the instructions for MTurk workers. Let’s quickly modify the specified text, but for the most part we will leave it untouched.
Replace the first paragraph of text with the following:
1
We are conducting an academic survey about color perception. Select the link below to complete the survey. At the end of the survey, you will receive a code to paste into the box below to receive credit for taking our survey. Be sure to click continue on the last page where you receive your code to ensure that your data is submitted.
We will also delete the box with the template note to requesters.
Finally, replace the survey link with the Qualtrics link we made earlier.
To Do: Edit the
Design Layoutfor our Qualtrics task and link.
NOTE: The Survey Instructions is often a place to include a consent form, if you desire, instead of including it in your actual task, although it is often more convenient to tie the consent to the actual experiment in case you use it elsewhere (i.e., SONA). You can also click on Source to directly edit the HTML code for the instructions, which allows you to include JavaScript and CSS code to vastly increase the power and flexibility of these instructions.
Preview and Finish
Review the code and test it out to confirm that it is working. When you are happy with it, click Finish! You will be redirected to the Create tab again. From here, go ahead and post a batch for workers to complete (well, sandbox workers).
To Do: Finish reviewing the HIT, then post a batch of HITs for workers to complete.
Worker Sandbox
Head over to worker sandbox and search for your requester name. It may take a few minute to complete, but once it updates, go ahead and accept the HIT and complete it!
SONA Systems

In addition to Amazon MTurk, another frequent source of online data collection is Duke’s SONA Systems. Although primarily used for in-person data collection during a non-pandemic, SONA Systems is increasingly being used for online data collection, and I expect this practice to continue even after the pandemic.
In order to access Duke SONA Systems, you first need to contact Robin Dunn (robin.dunn@duke.edu) to request a user account.
Once logged in, the website gives you options to Create a new study, View and edit your studies, Add timeslots, and other relatively straightforward and intuitive options.
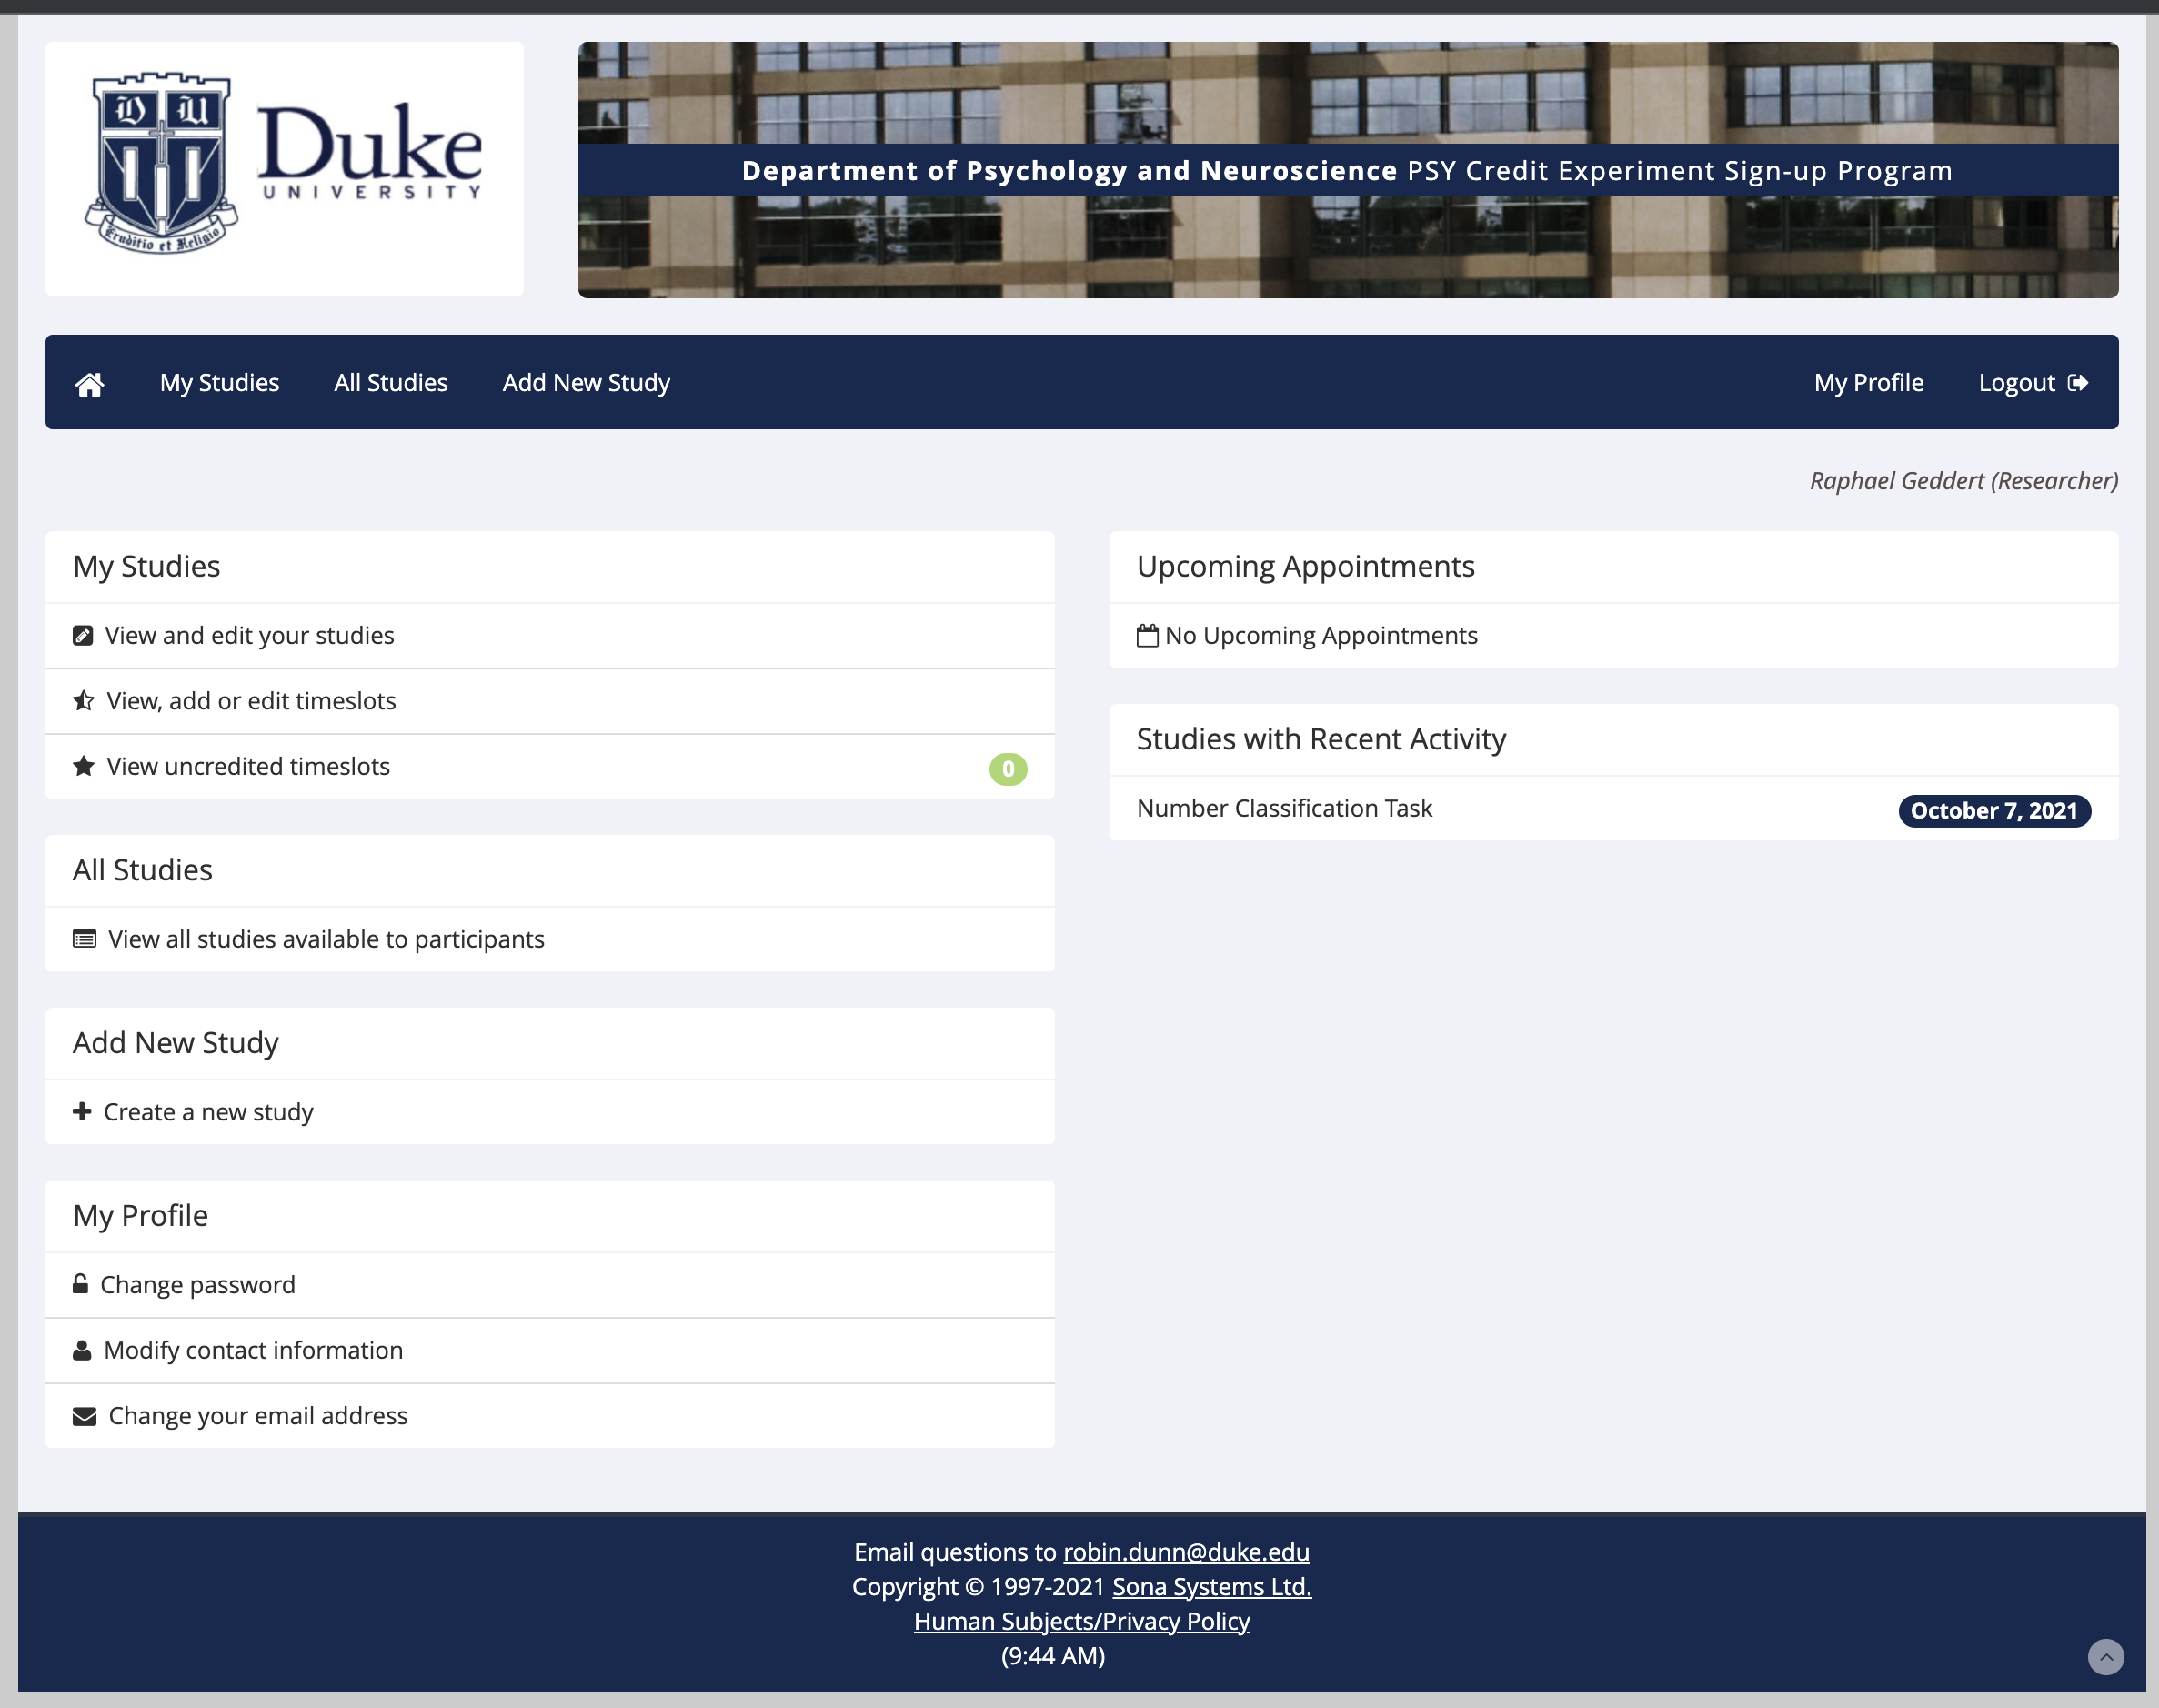
For this demo, we will Add a new study and select Online External Study, so that we can provide a link to our Qualtrics experiment to Duke undergraduates.
SONA Systems works on a credit system. For every half hour of experimentation, undergraduates receive 0.5 credits towards their credit requirement for their courses.
We won’t cover all the details of SONA here, but they are all very straightforward and manageable.
To Do: Learn about the various options available when creating a SONA experiment.
Experimental Design with JavaScript, HTML, and CSS
Although outside the scope of this tutorial, another option to all of the above, particularly Qualtrics, is to program and host your own experiment code on a website. Stay tuned, this will be covered in another tutorial at a future date!